Introduction
Helm charts are a convenient and efficient way to collect Kubernetes resources and build application clusters. They can also use environment variables on local machines to define values for your Kubernetes deployment to use.
This tutorial will cover different ways you can include environment variables in your Kubernetes deployment.
Prerequisites
- Access to the terminal/command line
- Minikube installed and configured (check out our guides on How to Install Minikube on Ubuntu and How to Install Minikube on CentOS)
- Helm installed and configured
How to Use Environment Variables with Helm
There are two methods of using environment variables with Helm charts:
- Using the secret object in Kubernetes to mount environment variables in a deployment.
- Writing a custom helper in a Helm chart.
For this tutorial, we are using the USERNAME and PASSWORD environment variables.
Note: Environment variables with Helm work similarly to environment variables in Linux, in Windows or any other OS. It passes information that helps define the environment.
Mounting Environment Variables in a Kubernetes Deployment
1. Add the following lines to the values.yaml file in your Helm chart:
username: root
password: password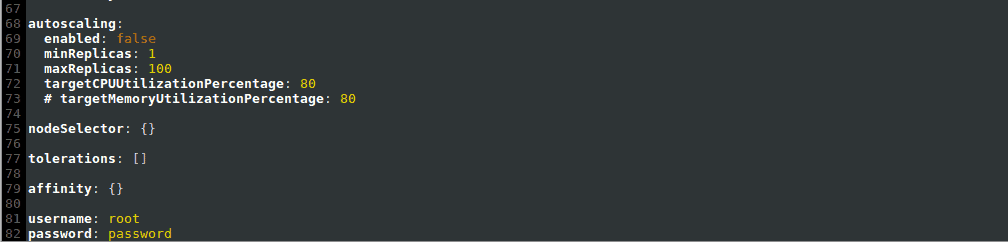
2. Create a new file called secret.yaml and add it to the template folder. Add the following content to the file:
apiVersion: v1
kind: Secret
metadata:
  name: {{ .Release.Name }}-auth
data:
  password: {{ .Values.password | b64enc }}
  username: {{ .Values.username | b64enc }}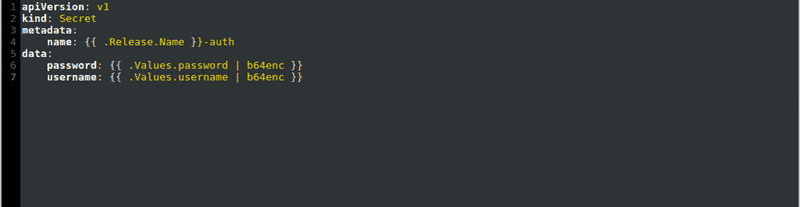
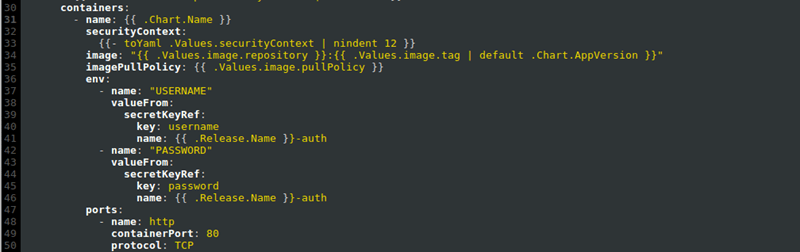
3. Edit the env section of your Kubernetes deployment to include the new variables defined in the secret.yaml file:
...
      containers:
        - name: {{ .Chart.Name }}
          securityContext:
            {{- toYaml .Values.securityContext | nindent 12 }}
          image: "{{ .Values.image.repository }}:{{ .Values.image.tag | default .Chart.AppVersion }}"
          imagePullPolicy: {{ .Values.image.pullPolicy }}
          env:
            - name: "USERNAME"
              valueFrom:
                secretKeyRef:
                  key:  username
                  name: {{ .Release.Name }}-auth
            - name: "PASSWORD"
              valueFrom:
                secretKeyRef:
                  key:  password
                  name: {{ .Release.Name }}-auth
...
4. Set the environment variables to your desired values. For example, set the USERNAME variable to hello_user:
export USERNAME=hello_user5. Apply the variables to the Helm chart by combining them with the helm install command:
helm install --set username=$USERNAME [chart name] [chart path]Where:
[chart name]is the name of the Helm chart you are using.[chart path]is the path to the Helm chart you are using.
If you want to test the new settings out before applying them, use the dry run mode:
helm install --dry-run --set username=$USERNAME --debug [chart name] [chart path]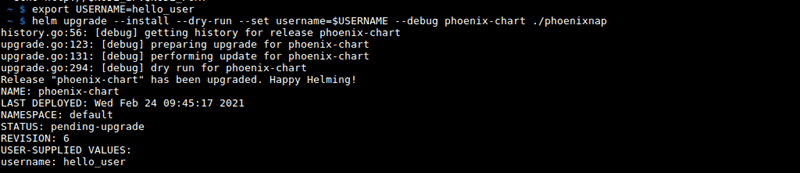
Adding a Custom Helper in Helm
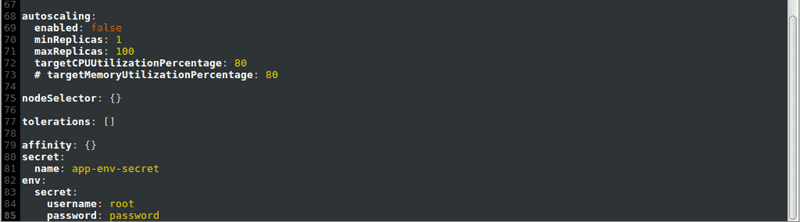
1. Use the env section of the values.yaml file to define sensitive and non-sensitive variables. Use the normal and secret categories to list the appropriate variables:
secret:
  name: app-env-var-secret
env:
  normal:
    variable1: value1
    variable2: value2
    variable3: value3
  secret:
    variable4: value4
    variable5: value5
    variable6: value6
Using this method, we then add the USERNAME and PASSWORD variables to the secret category:
…
  secret:
    USERNAME: [username]
    PASSWORD: [password]
Where:
[username]is the value you want to set for the USERNAME variable.[password]is the value you want to set for the PASSWORD variable.
2. Add the path to the values.yaml file to the bottom of your .gitignore file:
charts/values.yaml3. Create a file called secrets.yaml in the templates folder and add the following content:
apiVersion: v1
kind: Secret
metadata:
  name: {{ .Values.secret.name }}
type: Opaque
data:
  {{- range $key, $val := .Values.env.secret }}
  {{ $key }}: {{ $val | b64enc }}
  {{- end}}
4. Find the helpers.tpl file in the templates folder. Add the following to the bottom of the file to write a new helper function:
{{- define "helpers.list-env-variables"}}
{{- range $key, $val := .Values.env.secret }}
- name: {{ $key }}
  valueFrom:
    secretKeyRef:
      name: app-env-secret
      key: {{ $key }}
{{- end}}
{{- end }}
5. Call on the helper you created by adding the following to your pod.yaml file:
…
spec:
  containers:
  - name: mycontainer
    image: redis
    env:
    {{- include "helpers.list-env-variables" . | indent 6 }}
  restartPolicy: Never
Note: Learn more about using Helm charts with our tutorials such as:
Conclusion
After following this tutorial, you should have your deployment set up to use environment variables.
