Introduction
Node.js is an open-source JavaScript runtime environment. Since Node.js has an active user community, minor software updates come out every few weeks. You may be using Node.js as a layer of the MEAN stack or in a different JS framework. Either way, make sure to update Node.js regularly to ensure system security.
There are several ways to install Node.js and NPM. Similarly, there are several ways to update your Node.js version, depending on the operating system.
In this article, you will learn how to update Node.js on Linux, Windows, and macOS.
How to Update Node.js on Linux
There are different ways to update Node.js if you are using a Linux-based system. The Node Version Manager (nvm) is the easiest and recommended option. However, you can also update with the local package manager or by downloading the binary packages.
The sections below outline the steps for each method.
Update Node.js with NVM
The best and easiest way to upgrade Node.js is with nvm, a practical tool for managing multiple Node.js versions. Follow these steps:
1. Start by updating the system package repository:
sudo apt update2. Install nvm using the curl command:
curl -o- https://raw.githubusercontent.com/nvm-sh/nvm/v0.39.7/install.sh | bashNote: If you don't have curl, install the utility by running the command:
sudo apt install curlAlternatively, use wget and run the command:
wget -qO- https://raw.githubusercontent.com/nvm-sh/nvm/v0.39.7/install.sh | bashRunning either of the commands above downloads a script that installs or updates nvm on your machine.
3. Close and reopen the terminal for the system to recognize the changes, or run the command below:
source ~/.bashrc4. Verify that nvm has been successfully installed:
nvm --version
5. Before upgrading Node.js, check which version you have on the system:
nvm ls6. Now you can check for the available releases by running:
nvm ls-remote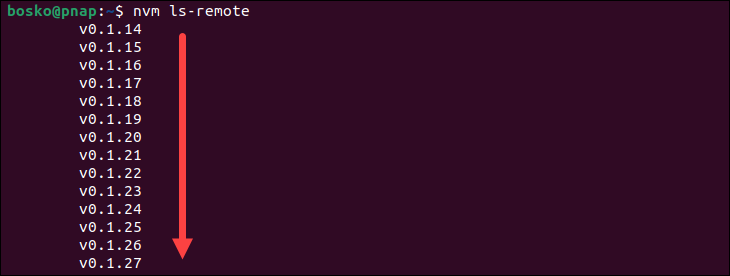
The output is a list of all available releases. Scroll down to the bottom of the list to find the latest one.
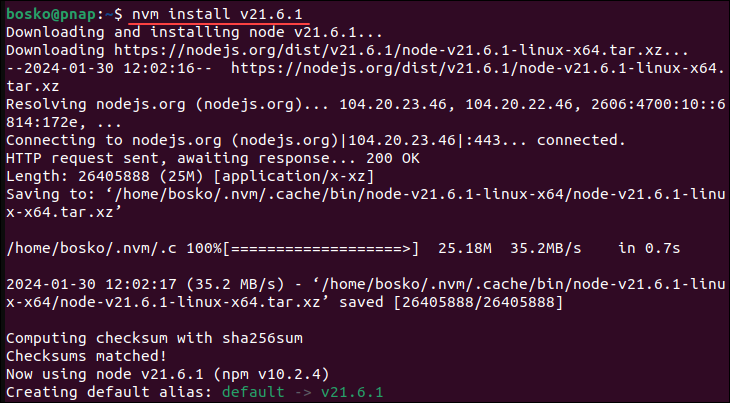
7. To install the latest version, use the nvm command with the specific Node.js version:
nvm install [version.number]For example:
Update Node.js with NPM
As an alternative, use Node's official package manager to update Node.js. Node Package Manager (NPM) is a tool for installing and managing package dependencies.
Note: Learn the difference between Yarn and NPM, two package managers for Node.js.
If you have Node on your system, you have NPM, as well. With the npm command, you can check running Node.js versions and install the latest release. By adding the n module, you can interactively manage Node.js versions.
Follow the steps below to update Node.js using NPM:
1. Clear the npm cache:
npm cache clean -f
2. Install n, Node's package manager:
npm install -g n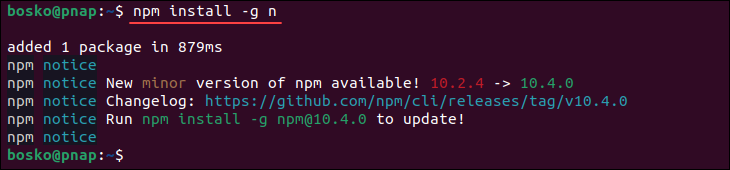
3. With the n module installed, you can use it to:
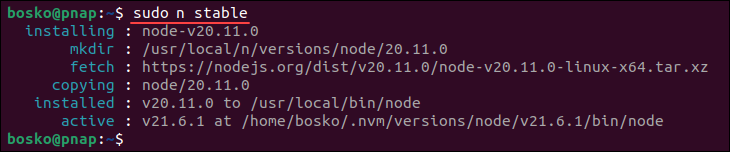
- Install the latest stable version:
sudo n stableNote: Some Ubuntu distros may respond with the command not found output after running the n command. To fix this issue, use the syntax below:
sudo -E env "PATH=$PATH" [command]For example, to install the latest stable version, as in the example above, you would run:
sudo -E env "PATH=$PATH" n stable- Install the latest release:
sudo n latest- Install a specific version:
sudo n [version.number]For example:
Update Node.js with APT
APT is the default package manager for Linux Ubuntu and Debian. Follow the steps below to update Node.js using the APT package manager:
1. Update the system package repository to ensure you get the latest available version:
sudo apt update2. Run the command below to update Node.js:
sudo apt install nodejs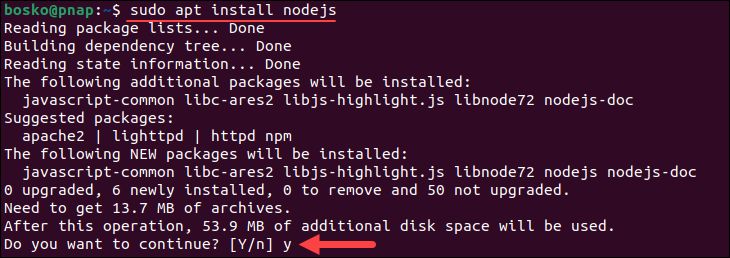
When prompted, type y and press Enter to continue with the installation. Wait for the process to complete.
3. Verify that the update has completed successfully by checking the Node.js version:
node -v
Update Node.js with Binary Packages
Updating Node.js with binary packages is the least recommended option. It doesn't resolve dependencies, and compared to updating via a package manager, it offers poorer security and more complex management.
However, if you are working in an environment where package managers are not available or suitable, follow the steps outlined below to update Node.js using binary packages.
1. Navigate to Node's official downloads page to see all the available packages. There, you can download the binary files for Linux:
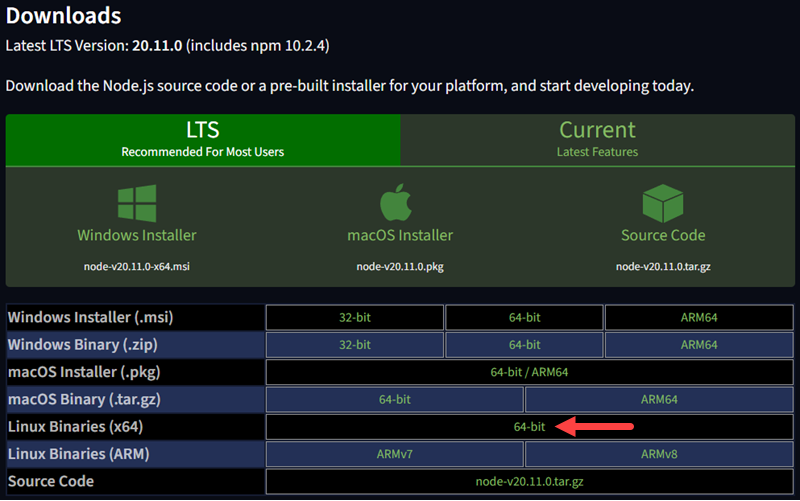
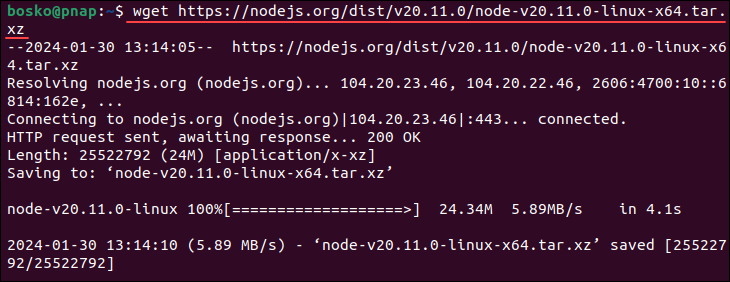
2. Either download the package using your browser or find the version number you need and add the link to the wget command:
wget [link]For example:
3. Next, install xz-utils used to extract the binary package:
sudo apt install xz-utils4. Extract and install the package using the syntax below:
sudo tar -C /usr/local --strip-components 1 -xJf [package_name]For example:
sudo tar -C /usr/local --strip-components 1 -xJf node-v20.11.0-linux-x64.tar.xzThe command extracts and installs the downloaded package.
How to Update Node.js on macOS
Updating Node.js on macOS can be done in three ways:
- Using the macOS installer.
- Updating without Homebrew.
- Updating with Homebrew.
The sections below explain each method in detail.
Update Node.js with macOS Installer
A manual update involves downloading the installer from the official website and updating the app using the installation wizard. A manual update gives you direct control over the process. Follow the steps below:
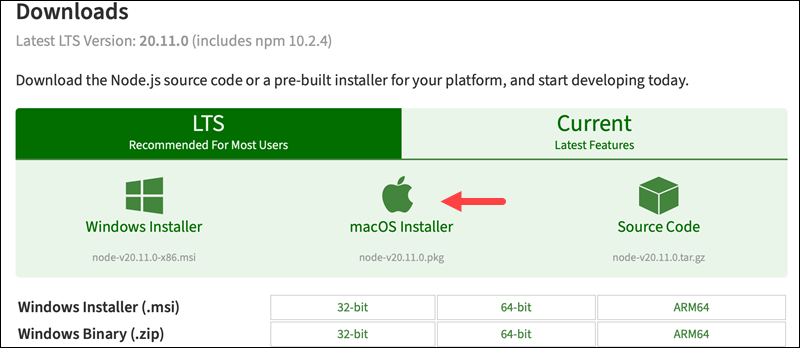
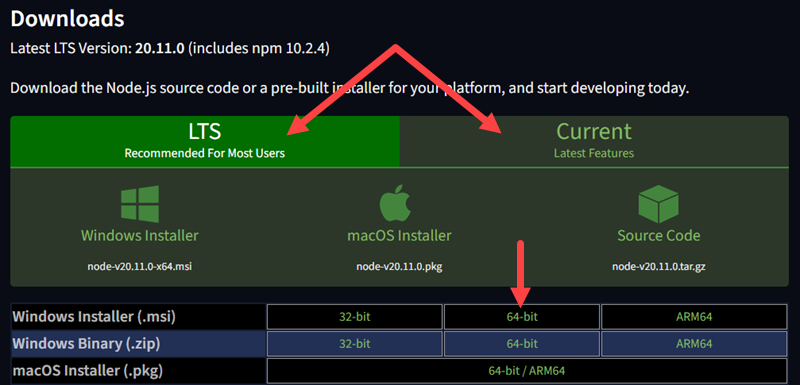
1. Navigate to the official Node.js website and download the macOS installer for the latest version. You can choose the LTS (long-term support) version for the latest stable version or the Current version for bleeding-edge features.
2. Double-click the file to run the installation wizard and follow the prompts to install Node.js. Accept the license agreement, choose the destination folder, and which features to install.
3. When the process completes, verify the installation by running the command below:
node -v
Update Node.js without Homebrew
Assuming that you have previously installed them, you can also use nvm or n package manager to update Node.js and select which version you want to use.
Via nvm
Node Version Manager (nvm) is a tool that allows you to manage multiple installations of Node.js on a single machine. Follow the steps below to update Node.js using nvm:
1. Check the currently installed Node.js version. Run:
nvm ls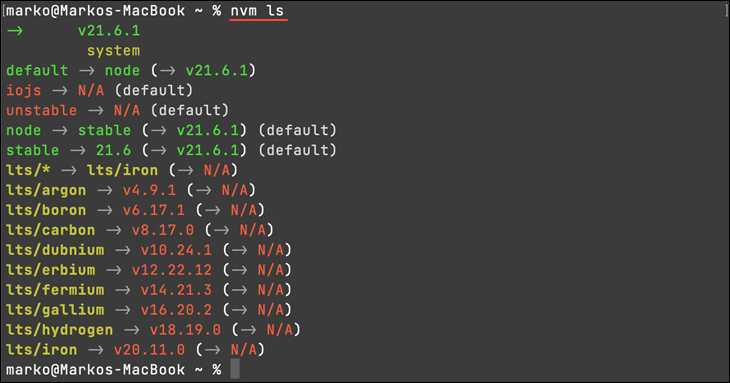
2. Run the command below to install the latest available Node.js version:
nvm install node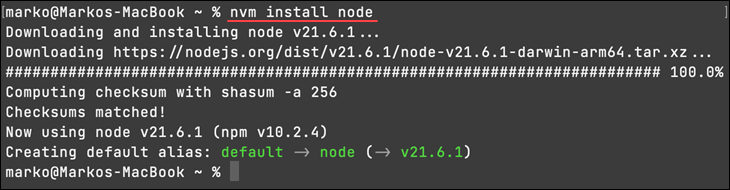
The command installs the latest stable Node.js version.
3. Once the installation is complete, switch to the newly installed Node.js version using the syntax below:
nvm use [version]Replace [version] with the version number you installed, and the command activates the specified version.
Via n
n is another Node.js version manager. It is similar to nvm but simpler and more lightweight, making it more straightforward to use than nvm.
Follow the steps below to update Node.js using n:
1. Install n using npm if you do not have it installed yet. Run the command below:
sudo npm install -g n
2. Update Node.js using one of the commands below, depending on your preference:
- To install the latest stable node release, run:
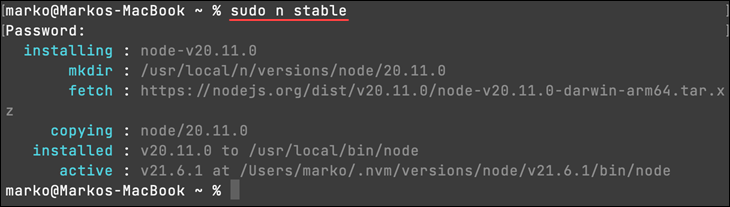
sudo n stable- To install the latest node release:
sudo n latest- To install the latest LTS node release:
sudo n ltsFor example, we will update Node.js to the latest stable release:
Update Node.js with Homebrew
If you installed Node.js through the Homebrew package manager, follow the steps below to update it:
1. Open the Terminal app from the Applications/Utilities folder and update Homebrew to get the latest package available in the repository. Run the following command:
brew update2. When the process completes, run the command below to update Node.js:
brew upgrade node
After the upgrade process completes, verify the Node.js version by running:
node -vThe command should display the updated version number.
3. Optionally, update npm as well by running:
npm install -g npm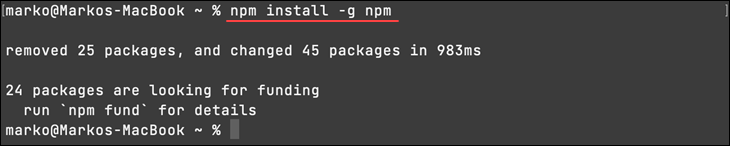
How to Update Node.js on Windows
In Windows, there are three ways to update Node.js:
- Using a Windows installer.
- Using
nvm. - Via the Chocolatey package manager.
The sections below show all methods for updating Node.js on a Windows machine.
Note: See how to install Node.js and NPM on Windows.
Update Node.js with Windows Installer
One way to update your Node.js is to go to its official download page and install the newest release. By updating this way, the system should overwrite the older version with the updated one.
Follow the steps below:
1. Navigate to the official Node.js website and download the LTS (latest stable version) or Current (latest version with newest features) program version installer for Windows.
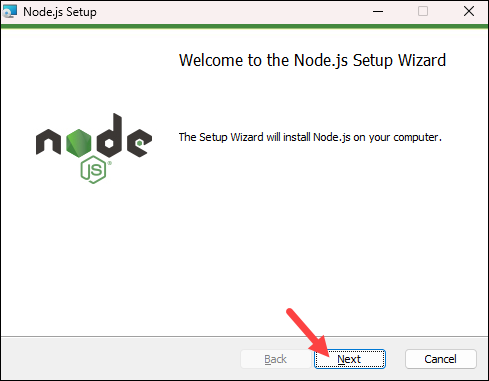
2. Run the installer (.msi file) you downloaded. Click Next on the Welcome screen to continue:
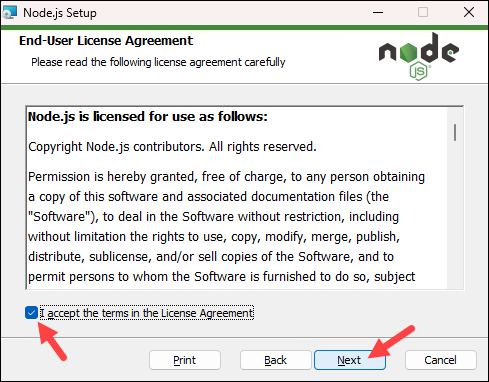
3. Check the box to accept the License Agreement and click Next to continue.
4. In the next steps, choose the destination folder, the features you want to install/update, and decide if you want to install/update tools for native modules (Chocolatey, Python, and Visual Studio Build Tools). When you finish configuring, click Install to install the update:
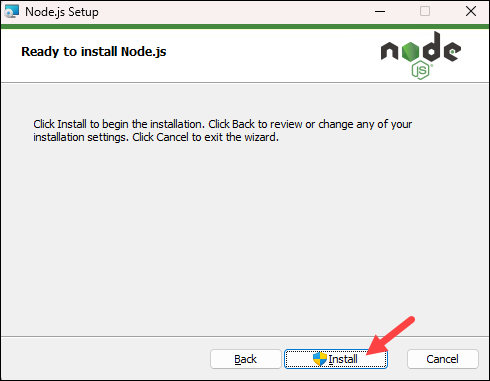
Wait for the process to complete and, when done, click Finish to exit the installer.
5. After installation, open a command prompt or PowerShell window and run:
node -vThe output should display the new version number, confirming that Node.js has been successfully updated.
Note: Sometimes, the system fails to overwrite the older Node.js release and you may end up with two versions. If such problems occur, you may want to consider updating with NPM, outlined in the section below.
6. Although npm usually comes bundled with Node.js, it is a good idea to update it to the latest version if it has not been automatically updated. Run the following command in a command prompt or PowerShell window to update nvm:
npm install -g npm@latestUpdate Node.js using nvm
To update Node.js on Windows using nvm, you need to have nvm installed separately from Node.js. The tool allows you to install and manage multiple Node.js versions on your system.
Follow the steps below:
1. Navigate to the GitHub nvm releases page, scroll down to the Assets section, and expand it. From the list, choose your preferred installation method. For this tutorial, we will use the executable file:

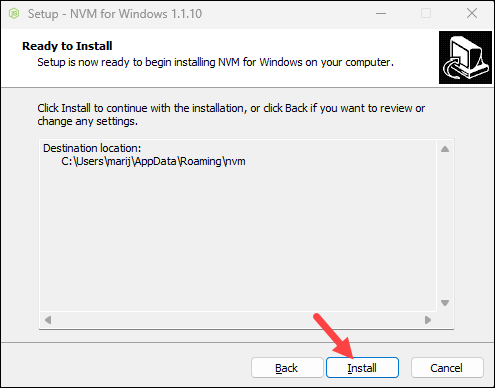
2. Open the installer, accept the license agreement, and specify the installation destination and the symlink folder. You can leave all the default settings and click Install when finished.
3. When Node.js is already installed on the system, the wizard asks if you want nvm to control the installed version. Click Yes to continue with the installation.
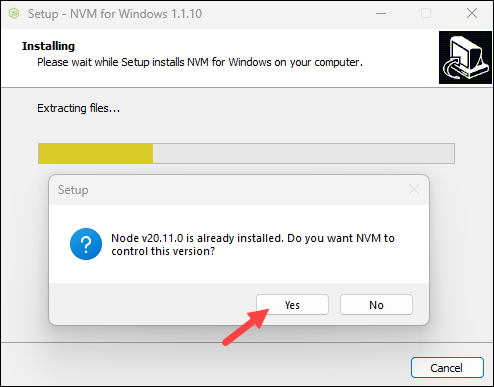
Wait for the installation to complete and click Finish to exit the installer.
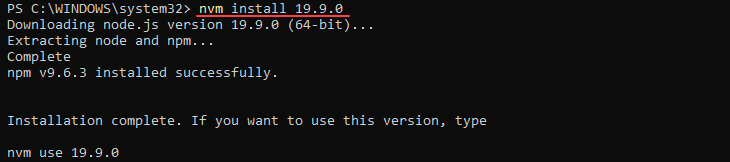
4. Open a command prompt or PowerShell window and use the syntax below to update Node.js with nvm:
nvm install [version_number]Replace [version_number] with the program version you want to install. For example:
5. To activate the installed version, use the syntax below:
nvm use [version_number]Update Node.js with Chocolatey
Chocolatey is a popular Linux-style package manager for Windows. It is convenient to keep your system updated with the latest stable program versions. Follow the steps below:
1. Open the Command Prompt or PowerShell as Administrator to ensure you have the necessary permissions.
2. Before updating Node.js, run the following command to ensure that Chocolatey itself is up-to-date:
choco upgrade chocolatey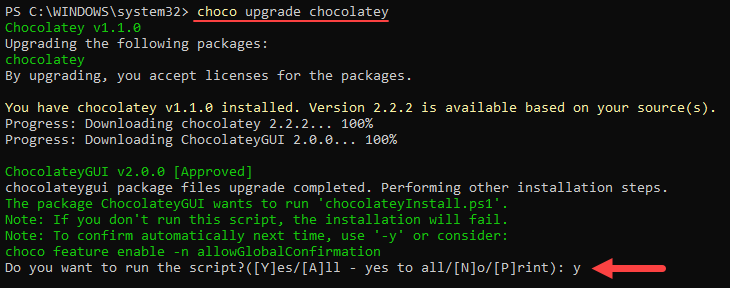
When prompted, type y and press Enter to continue upgrading Choco.
3. Once Chocolatey is updated, search for Node.js packages by running:
choco find nodejs.install
The output shows the available versions.
4. Upgrade to the latest program version using the syntax below:
choco upgrade nodejs.install X.X.XReplace X.X.X with the version number. For example:

The command upgrades Node.js to the specified version.
Note: Learn how to downgrade Node version in Windows.
Conclusion
Updating Node.js is essential for ensuring optimal performance, security, and compatibility with the latest features and libraries. By following the steps outlined in this tutorial, you should now have the latest Node.js version on your system.
Next, check out our tutorial for building a Node.js app with Docker, or see how to install and set up MEAN stack on Ubuntu.
